
If you’re thinking about putting up a new fence, it’s a good idea to consider fitting gravel boards as part of your DIY project.
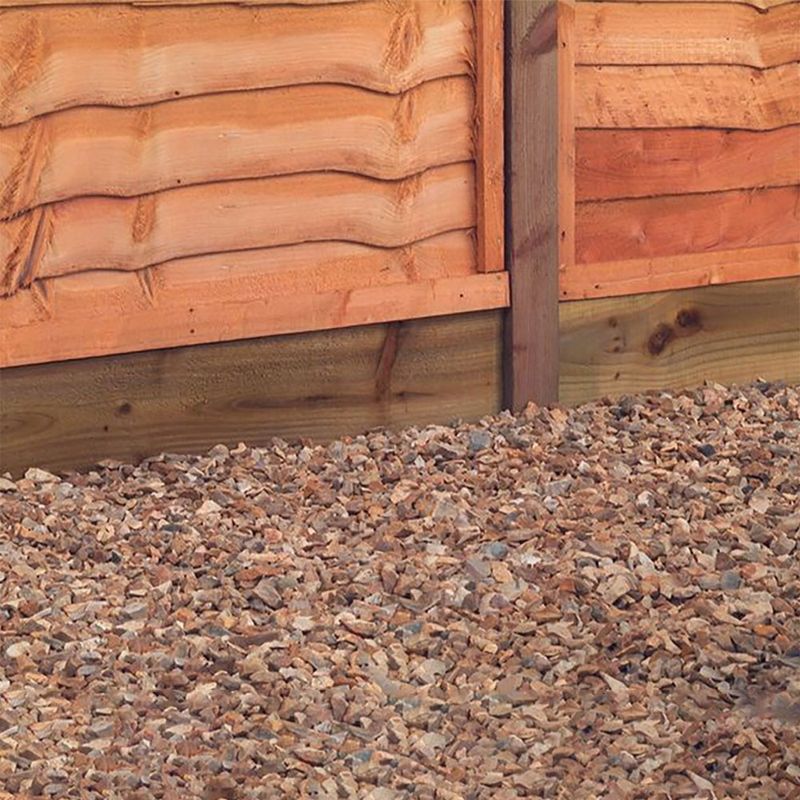
A gravel board acts as a barrier between the bottom of the fence panels and the ground, protecting them from direct contact with soil. This helps prevent moisture absorption, reducing the risk of rot and decay in the fence panels.
At Landscaping Superstore, we’re here to walk you through the installation process step by step. Read on to find out how to fit a gravel board like a pro.
Table of contents
- What is a gravel board?
- How to fit a gravel board
- How to install timber gravel boards
- How to install concrete gravel boards
- What size concrete post do I need for a 6ft fence with gravel board?
- To conclude
What is a gravel board?
A gravel board is an optional component for a fence, designed to be added at the bottom to prevent panels from succumbing to rot. Its primary purpose is to shield the fence from potential damage caused by moisture, debris or insects, providing an additional layer of protection.
Installing a gravel board is usually a straightforward process and serves as a simple yet effective measure to enhance the overall appearance and security of your fence.
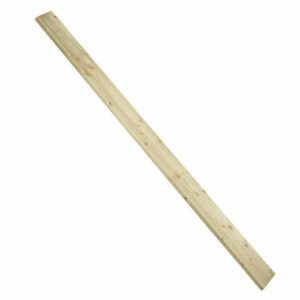
There are two main types of gravel boards – timber and concrete. Timber is commonly chosen by engaged homeowners, especially when aiming for a traditional look that complements decorative fence panels.
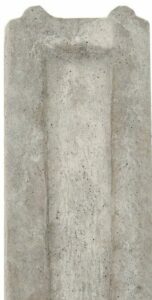
On the other hand, concrete gravel boards offer increased strength and are resistant to rot, making them a durable alternative – especially so in areas prone to flooding and heavy rain. However, their appearance may be more conspicuous, especially when used with closeboard or lap panel fences.
Despite this, concrete gravel boards prove advantageous when paired with concrete fence posts. Beyond a matching appearance, they contribute to a sturdier and more secure overall structure. Additionally, they require minimal maintenance, making them a practical solution for long-term use.
How to fit a gravel board
In a nutshell, to fit a gravel board on a fence, you’ll have to start by ensuring the fence posts are level and secure before attaching the gravel board horizontally at the base of the fence.
With that in mind, here are the specific steps for installing timber and concrete gravel boards.
How to install timber gravel boards
Since different brands vary somewhat in their design, always read the manufacturer’s instructions carefully to determine fixing choices when gathering the necessary tools and items.
What you’re going to need:
- Treated timber board (22mm-25mm thick)
- Small timber wedge or stainless steel metal strip (referred to as a ‘cleat’)
- Nails or galvanised screws
- Drill
- Hammer
- Steel gravel board clips
- Tape measure
Step one: Prepare the panels & create a gap
Ensure there is a gap beneath each panel for the gravel board. Identify the locations for placing cleats and mark them on the posts. If the fence is on a sloped area, tailor gravel boards to fit the slope, filling the angled gap beneath each panel.
Step two: Fit the boards
Insert the board between the fence posts and secure it using nails or galvanised screws. For screws, countersink them. For nails, drill pilot holes (two at the top and bottom along the centreline of each board) to minimise the risk of wood splitting. Insert the nails at an angle into the posts. Alternatively, use steel gravel board clips. Secure these by screwing them into the fence and the boards.
With these steps completed, your fence installation is now finished!
How to install concrete gravel boards
Installation of a concrete gravel board involves slightly different steps. Opting for concrete fence posts, such as a mortice post, along with concrete gravel boards ensures a durable and aesthetically pleasing fence in the long term.
Materials needed: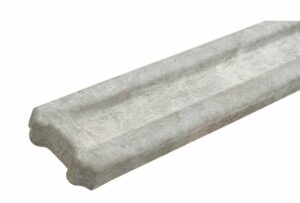
- Concrete gravel board (22mm-25mm thick)
- M8x80 bolts
- Round washers
- Two-pin push-in metal strips
- Nuts
- Square plate washer
Step one: Create a gap
As with timber gravel boards, you’ll need to start by creating a gap beneath each panel for proper gravel board placement. Mark the cleat locations on the post. In case of a sloped area, customise the gravel boards to fit the slope and fill the angled gaps beneath each panel.
Step two: Fit the boards
With concrete gravel boards, use concrete galvanised two-pin push-in cleats. Insert the cleat pins into the bottom holes of the mortice post, then secure the gravel board onto the cleat using an M8x80 bolt, nut and round washer. Additionally, include a square plate washer on the concrete face.
With these steps completed, your fence installation with concrete gravel boards is ready for the finishing touches!

What size concrete post do I need for a 6ft fence with a gravel board?
Given that the most common fence panel height is 6ft, it’s typically recommended to use 8ft posts to ensure proper elevation above the ground. This recommendation remains consistent when incorporating gravel boards, unless the fence panel exceeds standard height. This setup allows for a 150mm gravel board to fit beneath the panel, as the fence posts are secured in the ground.
It’s important to emphasise that this choice is influenced by personal preference. Whether the fence post is flush or level with the panel, as long as it extends at least 2ft beyond the panel, it can effectively serve its purpose.
To conclude
Fitting a gravel board to your garden fence contributes to its longevity, protects against moisture and damage, enhances the fence’s appearance and allows for easier maintenance and replacement when needed.
While this isn’t the easiest project you’re likely to come across, an experienced DIYer with a can-do attitude can confidently take on it.
And now that you know how to fit a gravel board – both timber and concrete types – that includes you, too!
Was this guide useful?
Mentioned in this project guide:


