
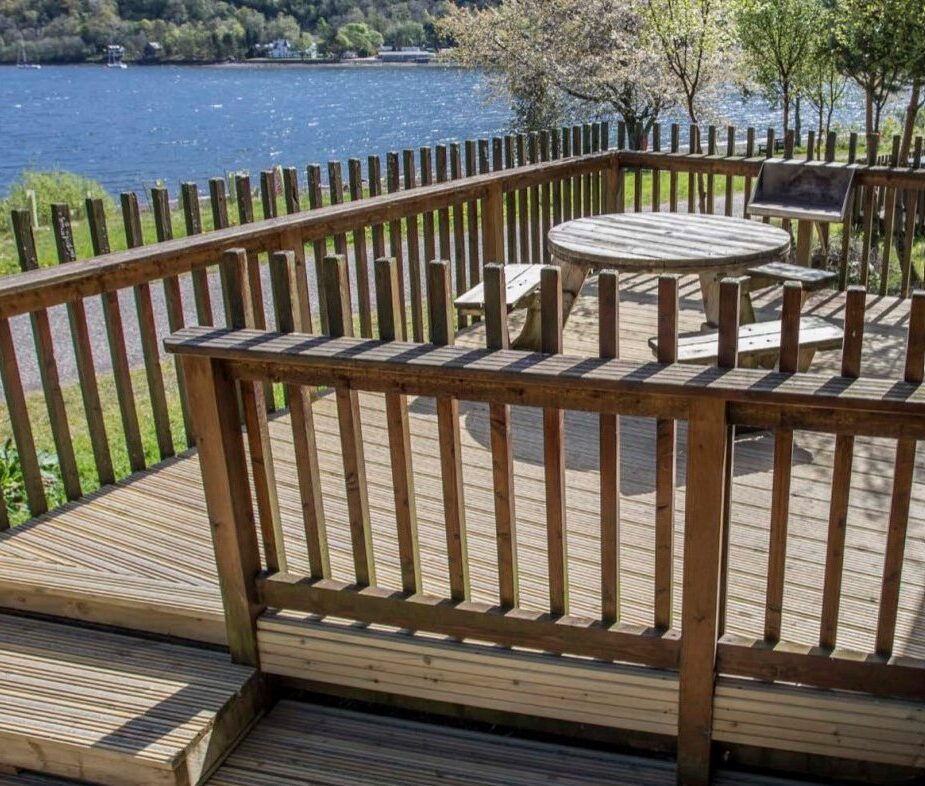
You have decided to install a raised deck. The modern appearance and idea of a grand surface to place furniture on a focal point of the garden is just too much to leave out of your landscaping design. So, how do you install raised decking to ensure the outdoor space is used to its full potential? Well, that’s where our guide comes in.
Whether you want to reduce the amount of grass for garden care or need a space for entertainment and social purposes, you can find out how to install a raised deck via this guide.
Table of contents
- What do you need for a raised deck?
- How to prepare for a raised deck
- Squaring a site for raised decking
- How to build a raised deck
- Building the sub-base/sub-frame
- Fitting the balustrades
- Laying boards for a raised deck
- How to install raised decking steps
- How to fit hand railings to decking steps
- How to install skirting panels beneath a raised deck
First of all, what do you need for a raised deck?
The items below are what you need from start to finish. Please check what you need for the stage you are at:
- Decking boards
- Tape measure
- Mark square
- Pencil
- Deck fixings
- Hammer
- Jigsaw
- Sandpaper
- String/builder’s line
- Tarpaulin
- Pegs
- Drill
- Dowels
- Quick-release clamp
Your very first step should also be to plan. Without one, this leaves you with a deck with a wonky surface – or worse. You must also check that no cables or pipes are on or beneath the surface.
If you cover pipes and cables, these won’t be easily accessible after installing the new deck. You could have a hefty cost to remove and replace it if something goes wrong with those features.
With all your tools set, let’s get to it – the raised decking installation!
How to prepare for a raised deck
You’ve got your tools – let’s get started!
Step one: Get planning permission
A deck built more than 30cm off the ground or covering over 50% of the garden space will need planning permission. Not obtaining planning permissions means the decking will need to be removed.
Step two: Plan the size of your future decking
This factor will influence what you buy. You should measure out the site using a builder’s line or string and pegs to mark the size and corners.
You can measure it in two ways:
- Diagonally from post to post
- Using a set square
Step three: Remove all the plants, rocks, etc., in the marked area
This will typically be to a minimum depth of 50mm. Utilise an edger to clear any turf and use a spade to remove the grass. Lift it in strips and place it somewhere unobstructed.
Note: Don’t throw turf or grass away if you plan to have greenery around the deck when finished, because you could use this.
Squaring a site for raised decking
One of the most popular methods for squaring a site in preparation for a patio is the 3-4-5 method, also known as the 3-4-5 triangle method. This is common for finding squares (not only for decking but also for many other projects).
You can find out how to use the 3-4-5 method in our guide, but for a brief introduction, here is how to use that method:
- Starting at one corner on one side, measure three (or a multiple of three) inches from that corner. Mark this measurement.
- At the same corner, switch to the opposite side, then measure four (or a multiple of four) inches from the corner. Mark this measurement.
- Between the two marks made, measure the distance. If the distance is five (or a multiple of five) inches, you’ve got your square.
This method is often used because it is a simple version of the more commonly known Pythagoras theory.
How to build a raised deck
Starting with the outer frame
Once you are sure there are no cables or pipes beneath the squared surface, you can begin building the deck, starting with the outer frame! Help may be needed for this process, so ensure you’re prepared.
Step one: Prep a space for supporting posts for the joists
These will be offset to one side to ease the installation of railings or balustrades. In each corner of the square space you’ve marked for installing your decking, dig holes around with the following measurements –
- 700mm deep
- 400mm wide at the bottom
- 300mm wide at the top
Step two: Add the posts into the holes
These must be evenly spaced out with the centre of the individual posts at a maximum of 1.8m apart. You must also add something to keep the posts in place.
Step three: Add the quick-drying cement into the corner holes dug in step one
Shape the cement into place, sloping it away from the posts and waiting for it to set.
Step four: Once dry, remove the markings, post supporters and string from the squared area
Cover this area with weed control fabric, cutting holes to fit around the standing posts, and cover the control fabric with gravel.
Building the sub-base/sub-frame
The subframe will be the outer frame of the raised decking. The edging of the decking, if you will.
Step one: Cut the joists and add them to the outer frame
When cutting the joists to add to the outer frame, ensure they’re cut to length, allowing for overlapping corner joints. Use a brush to coat the ends of the newly cut timber with end grain preserve.
Step two: Place the side joists against the outside of each corner post
The ends should stick out width-wise of each post to allow the railings to fit inside the frame.
Note: Use a spirit level to check that the joist is level before securing it in place.
Step three: Attach the timber joists to the posts
Create a countersunk hole by drilling holes through the joists and into the corner posts. This will help the screw heads sit flush with the wood. Then, using a ratchet handle, attach the timber joist to the post with two coach screws and a socket set.
Step four: Add a second countersunk hole
When connecting the corners of the outer joists, grab a couple of coach screws (at least two or more). So, you’ve got your two joists in position, and the supporting posts are all firmly attached. Now, repeat this process for the rest of the outer frame.
Tip: If attaching it to a wall, place the sub-frame joist against the wall joist; attach it with metal joist hangers and 50mm galvanised nails – drill pilot holes to prevent the wood from splitting.
Step five: Add supporting beams
To ensure the decking can withstand long-term use, screw a support beam on either side of every second post with two coach screws. Position them directly below the joist attached to the sub-frame.
Step six: Attach the joists to the outer frame
Cut the inner joists to the side, ensuring each end has at least two countersunk coach crews. This will attach the joists to the outer frame. Remember, if attaching to the wall, then use joist hangers.
- If choosing a horizontal pattern: the centre of two inner joists must be a maximum of 450mm apart.
- If choosing a diagonal board pattern: joists must be a maximum of 300mm apart.
Fitting the balustrades
You must install balustrades before the decking and after the subframe. They can also vary in height depending on your needs. Taller railings are recommended, especially if small children are likely to use the deck, to stop them from climbing over the side. Also, check that there is enough space for the deck boards to be added
As you fit each deck post, choose an ideal space between each one as well. 1.2m apart is typically recommended because it ensures there are no risks of anything fitting through the space.
Now onto fitting the balustrades!
Step one: Drill pilot holes along the rail’s base
Use a drill along the base of the rail to drill pilot holes around 100mm apart.
Step two: Insert spindles on the underside of the handrail
Insert spindles in the grooved underside of the handrail. These are secured in place by screwing through them diagonally to ensure a firm fit. To maintain even spacing, use a piece of timber equal to the distance wanted and evenly space out the spindles.
Step three: Drill pilot holes through the bottom of the newly fitted spindles
Once the spindles are installed, drill pilot holes through the bottom of each one and use 50mm deck screws to attach the spindles to the base rail.
Step four: Insert the posts
Between the supporting post and the corner of the sub-frame, insert a deck post in the gap; add a clamp to keep it in place. Use two countersunk coach screws to secure this post to the sub-frame.
To ensure the corner post is securely in place, fit a joist off-cut between this post and the first inner joist; then screw this to the sub-frame using deck screws.
Now place the next deck post and secure it using one coach screw to push it to one side as you install the balustrade.
Step five: Drill two holes on either end of the hand and base rails
Using masking tape, mark a 12mm drill bit 38mm from the tip of the post and drill two holes at that newly marked depth on either end of the hand and base rails.
Step six: Insert dowels into the new holes
In the newly made holes, insert 12mm dowels. Then mark where the holes will be parallel on the adjoining posts at the top and the bottom.
Step seven: Slot the balustrades in place
In each post, drill 38mm holes at the newly marked points, then insert the wooden dowels into those holes. You can then slot the balustrade into place. Use quick-release clamps to hold the post and balustrade together, keeping them in place while the glue dries.
Step eight: Finalise your new balustrade!
To secure the second post, add another coach screw to the base, and there you have it! A newly installed balustrade.
Laying boards for a raised deck
Time to get to the base!
Step one: Lay the boards at the outer edge of the sub-frame
Starting from the outer edge of the subframe, lay the boards and move inwards as you go.
Step two: Cut notches into the board
To ensure the first board stays fitted around the post, cut notches into it. You can do this by cutting the board to length and clamping it into position in front of the deck posts. These will also need to overhang the subframe.
Step three: Prepare the deck boards for the posts
Use a combination square to measure the outline of the deck posts. Mark this on the deck board. Then remove the deck board and place it on a workbench, clamping it with the face side up. Use a jigsaw to cut out the shape of the deck post.
Note: Ensure the cut edges are treated with an end grain protector to allow for a smoother fit when reinstalled.
Step four: Insert the newly cut deck board into position
If you don’t make the inner edge of the board flush with the deck post’s inner edge, you must plane or saw down the outer length. Once this is in place, use a straight edge to lay the other deck boards.
How to install raised decking steps
With a raised deck, it’s safe to say you need some steps for that tall surface.
Step one: The area you plan to put the steps must be level and firm
Failing this task risks the steps sinking into the ground and/or being unsafe to walk on. If the land isn’t firm, you can lay concrete or paving slabs in place for a more secure sitting place for your steps.
Step two: Fit step treads to step rises
As a rule, you must cut two sections of joist off-cuts the width of the step treads and attach them to step rises – top and bottom- using two countersunk coach screws on either side. This will be your step frame.
Step three: Fit the step frame against the subframe
Place the step frame against the subframe of the deck in the centre of the supporting area for your steps. Maintain the connection between the short edge of the step frame and the deck.
Step four: Fit the step assembly to the sub-frame
Drill pilot holes through the step assembly and sub-frame joist, then screw the step assembly to the sub-frame using four countersunk coach screws for a secure fit.
Step five: Fit the steps
For this, drill pilot holes into each end of the riser and screw the treads into place using two 50mm deck screws. Continue this process until each step has been fitted.
Note: For a solid stairway, instead of an open stairway, use joist off-cuts to fill gaps. Just measure the height and depth of the gap, then screw the timber into the step rise using two screws on either end.

How to fit hand railings to decking steps
If the steps are steep or you want a little extra detail, fitting a handrail is optional. This can complete the look and improve safety when the steps are used. During these steps, you’ll learn how to create a post with a notch and how to install it.
Step one: Measure and mark the posts
On the posts, if you plan to add handrails, measure and mark the posts with a square.
Step two: Score the post and remove newly cut section(s)
Score the post with a jigsaw and use a chisel to remove the newly cut section. Do not remove over half the post. Removing over half can weaken it and risk it breaking.
Step three: Smooth down rough edges and treat with end grain
Smooth down any rough edges (old and newly cut) with sandpaper. You can improve the appearance further by treating it with an end-grain protector.
Step four: Add coach bolts to the posts and step riser
Install two coach bolts so they go through the post and into the step riser. Then place a length of the handrail on the outside of the face, parallel to the angle of the steps. Make sure to mark where the line of the outer edges of the post is with a pencil.
Step five: Cut along the pencil line with a jigsaw
After cutting along the pencil line, bolt the handrail to the posts. The edges should be flush. You can then attach the spindles by fitting a base rail the same way you would a handrail. Then cut the spindles to length, screwing them in place when ready.
There you have it! Newly installed step handrails.
How to install skirting panels beneath a raised deck
This is mostly a decorative choice for those who want something extra. However, it can also be used for the following:
- A storage space, if you want to hide anything, like garden tools or small furnishings
- Stopping children and pets from getting underneath the deck
- Stopping stray wildlife from getting underneath the deck
Even if you need access to the space beneath, you can add easily removable sections to ensure there is a way to access it in future if required.
Step one: Measure from the sub-frame to the ground
Calculating the panel size you need can be done in a simple action. Just measure from the sub-frame down to the ground, and this will give you the size needed.
Step two: Cut the lattice panel
Use a jigsaw to cut the lattice panel using the obtained measurements. If the panel has a frame, you need to remove the frame batten from one of the discarded sections. To do this, gently knock the frame batten off the lattice using a hammer.
Step three: Fix the batten to the lattice
Fix the batten to the lattice’s cut edge using 30mm galvanised screws.
Note: Adding wire mesh to the inside facing side of the panel is optional if you wish to further secure your decking.
Step four: Attach the panel to the deck
To attach the panel to the deck, drill pilot holes into the upper frame and screw the upper frame of the panel into the deck subframe with 65mm deck screws.
Be proud of yourself as you’ve completed your first-ever decking DIY build. Good for you!
Learn more about maintenance and how to clean your new decking with our other help and advice. Alternatively, explore our range of garden furniture to ensure you have a setup perfect for relaxing and hosting.

Was this guide useful?
Mentioned in this project guide:


